This guide provides step-by-step instructions for integrating your VTEX storefront with Fozzels. The process involves two main stages: generating the required API keys inside your VTEX Admin panel, and completing the setup within Fozzels.
Part 1. Setup on the VTEX Side
To allow Fozzels to read your catalog structure and write generated content back to your store, you need to create a dedicated Role with specific permissions and generate an Application Key and Application Token.
Step 1. Create a Role with Required Permissions
Log in to your VTEX Admin panel.
Navigate to Account Settings → User Management → Roles.
Click New Role.
Assign a clear name to the role (e.g.,
Fozzels Integration).Under the permissions list, add access for the following resources:
Catalog (License Manager):
Category— Read / WriteBrand— Read / WriteProduct— Read / WriteSKU— Read / WriteSpecification / Attributes— Read / Write
CMS (if used for media/images):
Read/Writeaccess
Save the new role.
Step 2. Generate Application Key and Application Token
In the Account Settings menu, navigate to Account Management → Application Keys.
Click Manage Keys or Generate Key.
Enter a recognizable Label (e.g.,
Fozzels Connector).Assign the role created in Step 1 (
Fozzels Integration) to this key.The system will generate two credentials:
Application Key (remains visible in your list).
Application Token (displayed only once upon creation).
Important: Copy and store the Application Token in a safe place immediately. Once you close the modal window, it cannot be retrieved again!
Users can also refer to the official VTEX Knowledge Base for detailed instructions on creating Application Keys and Tokens:
- Portuguese: https://help.vtex.com/pt/docs/tutorials/chaves-geradas#gerar-chave
- English: https://help.vtex.com/docs/tutorials/generated-keys
- Spanish: https://help.vtex.com/es/docs/tutorials/claves-generadas
Part 2. Setup on the Fozzels Side
Once your API credentials are ready, set up the connection inside Fozzels.
Step 1. Create a New Integration
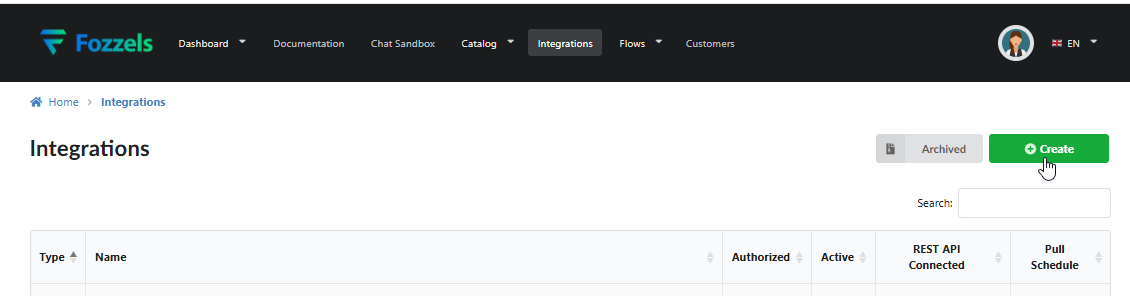
Log in to Fozzels and open Integrations from the top navigation menu.
Click the green + Create button.
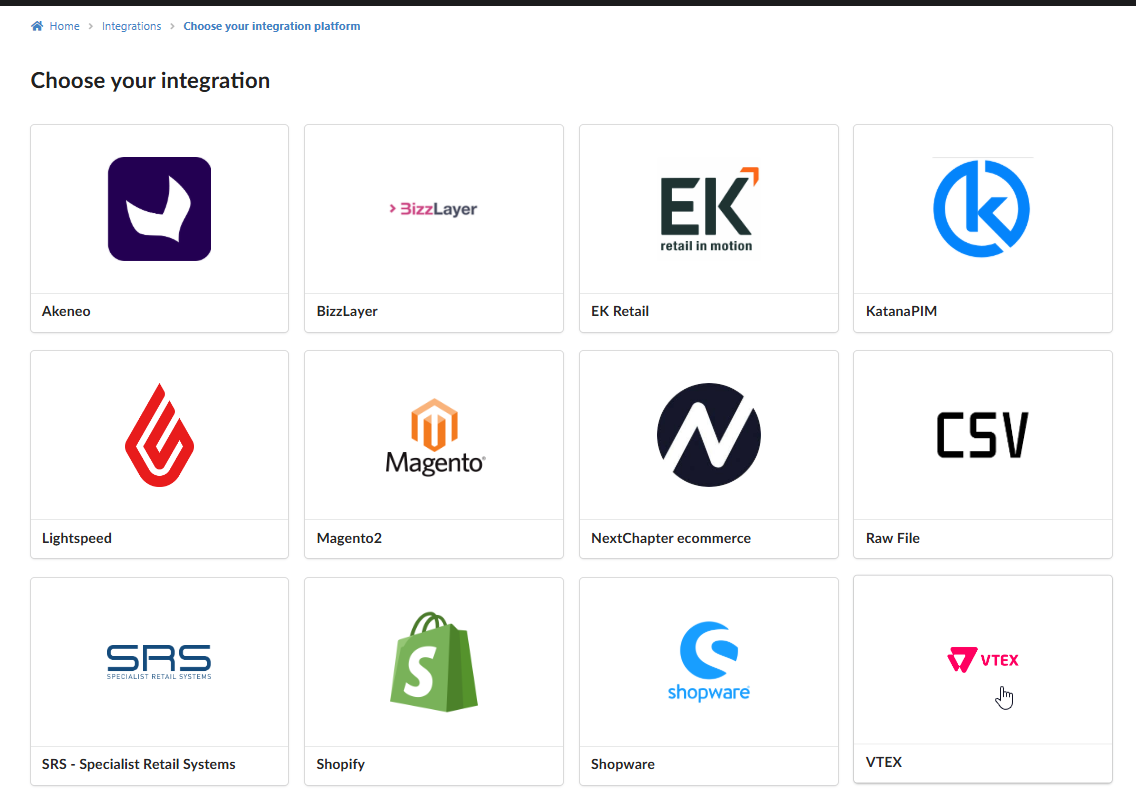
Select VTEX from the list of available integration platforms.
Step 2. Enter Configuration Details (Tab 1: Configuration)
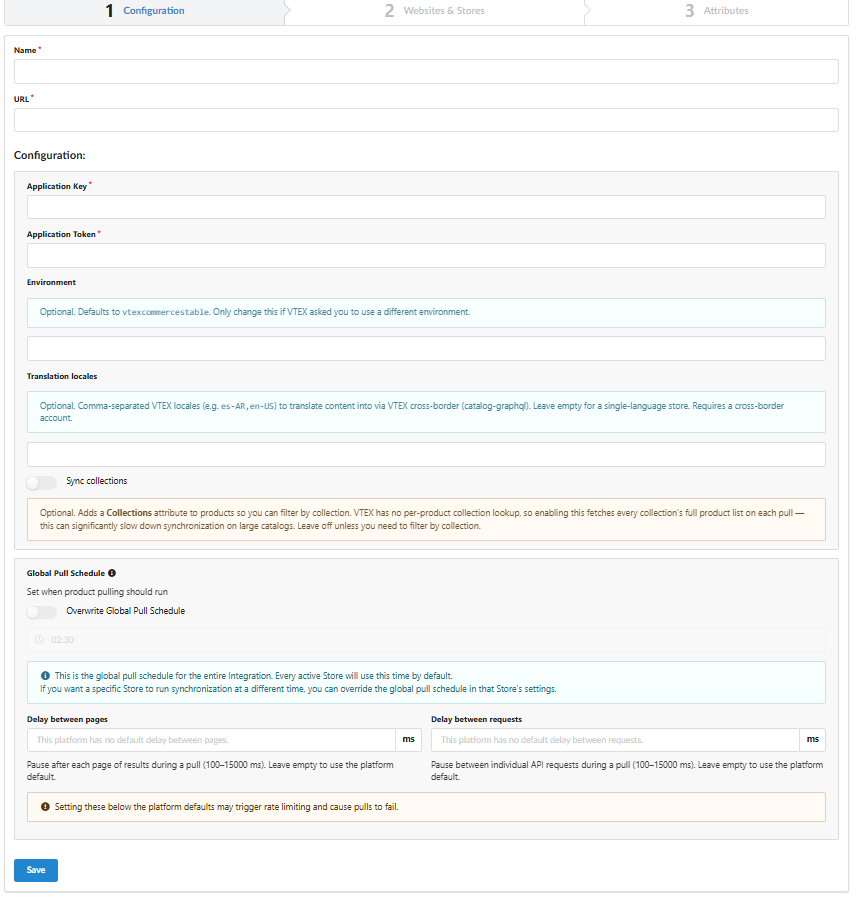
Fill out the connection form:
Name: Enter a name for this integration (e.g.,
VTEX Main Store).URL: Enter your VTEX store URL/domain.
Application Key: Paste the Application Key generated in VTEX.
Application Token: Paste the Application Token generated in VTEX.
Environment (optional): Defaults to
vtexcommercestable. Only modify this if VTEX instructed you to use a custom environment.Translation locales (optional): For cross-border accounts, specify comma-separated VTEX locales (e.g.,
es-AR, en-US). Leave empty for single-language stores.Global Pull Schedule (optional): Set a custom automated pull schedule or leave default settings.
Pull Throttling / API Delays (optional):
Delay between pages: Set a pause duration after each fetched page of results during a pull (
100–15,000 ms). Leave empty to use the platform default.Delay between requests: Set a pause duration between individual API calls during a pull (
100–15,000 ms). Leave empty to use the platform default.⚠️ Note: Setting these values below the platform defaults may trigger rate limiting from VTEX and cause catalog pulls to fail.
Click Save in the bottom-left corner.
Step 3. Verify Status & Fetch Stores (Tab 2: Websites & Stores)
Verify that all status indicators in the top-right corner are active:
Active — Enabled (green toggle).
Authorized — Green checkmark.
REST API Connected — Green checkmark.
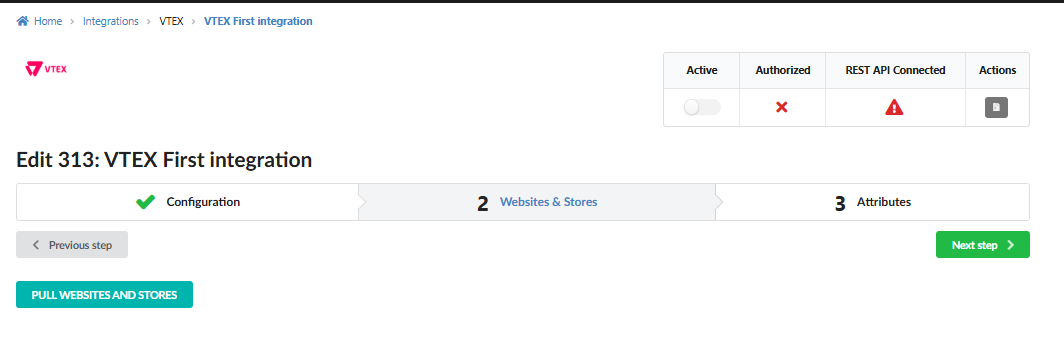
Click the PULL WEBSITES AND STORES button in the bottom-left corner.
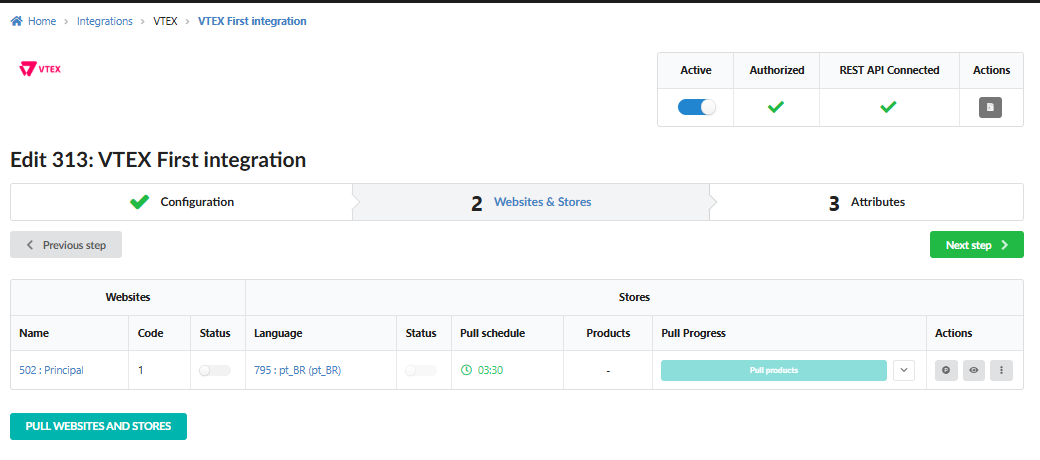
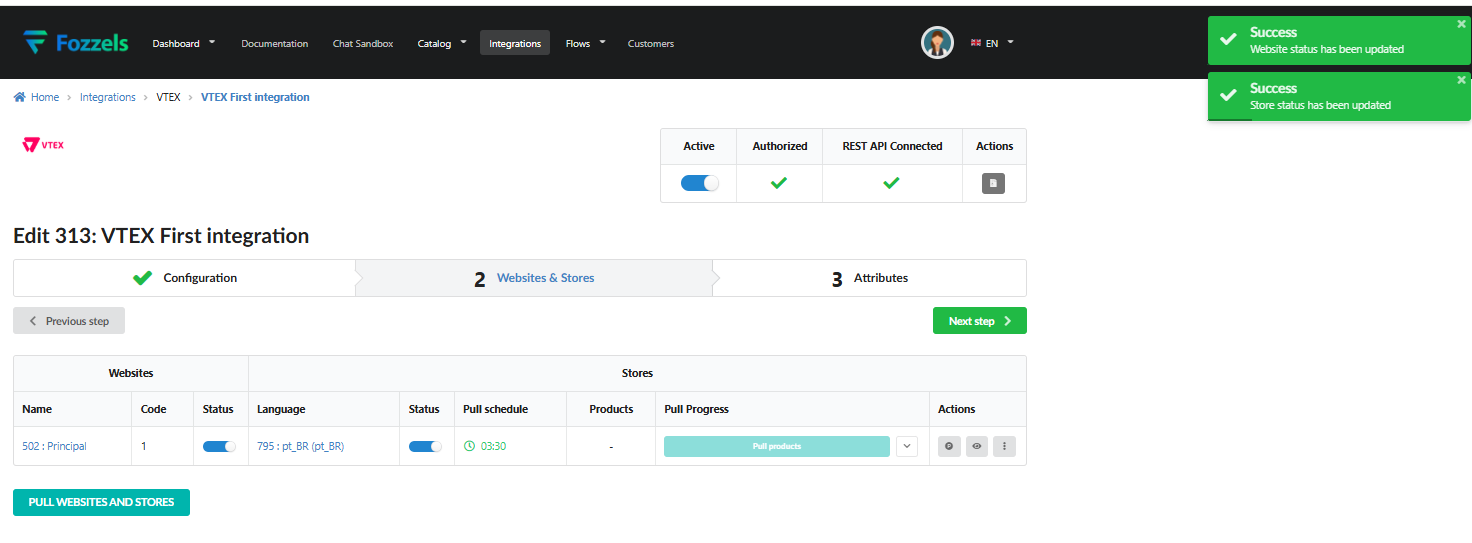
Your websites and store locales will appear in the table. Toggle the Status switches to active for the websites and stores you plan to process.
Step 4. Pull Catalog Data (Pull Products)
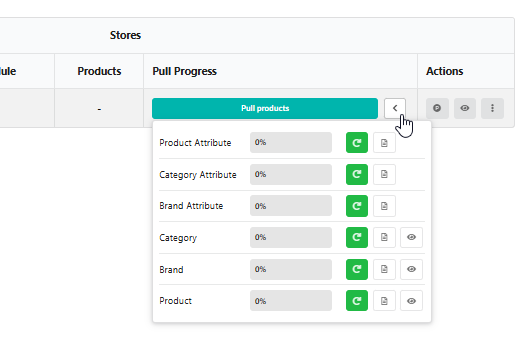
Locate your store in the table and click Pull products (or click the dropdown arrow next to it).
You can trigger data sync for specific entities or run them sequentially:
Product Attribute
Category Attribute
Brand Attribute
Category
Brand
Product
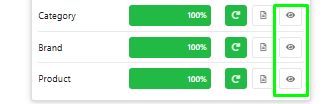
Wait for the sync to finish. Each entity status will turn green showing 100%.
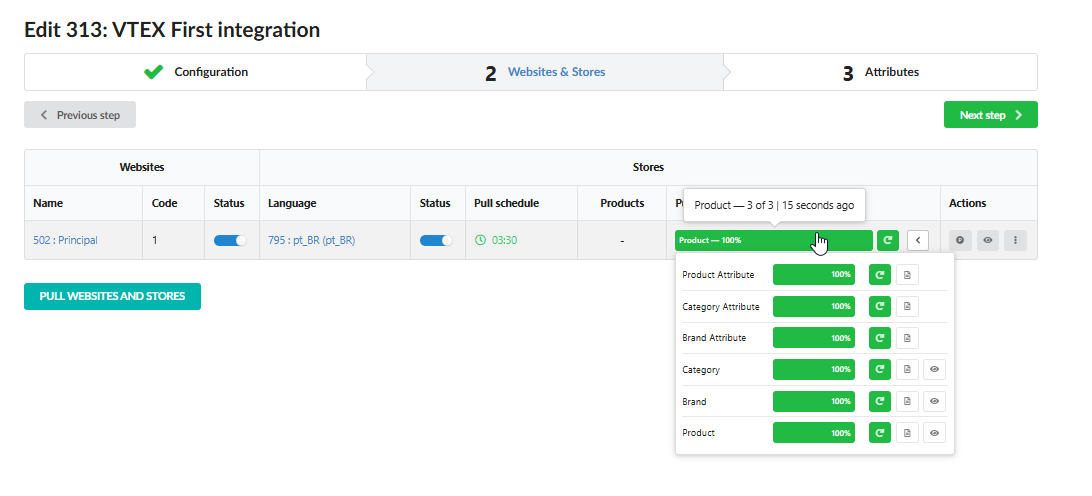
Click the eye icon (View) next to any entity block to inspect the pulled data.
Congratulations! Your VTEX integration is now fully set up and ready to go. Fozzels will now seamlessly sync your catalog data, allowing you to generate high-quality AI product descriptions, localized content, and metadata with ease. If you need to make any adjustments later, you can always return to the Integration Settings page.
Happy automating!
Was this article helpful?
That’s Great!
Thank you for your feedback
Sorry! We couldn't be helpful
Thank you for your feedback
Feedback sent
We appreciate your effort and will try to fix the article