This guide walks you through creating a new Salesforce Commerce Cloud integration, from initial setup to saving your configuration, activating Websites & Stores, pulling product data, and reviewing attribute mappings. You'll learn how to fill in the required connection details (Short Code, Organization ID, Client ID/Secret), understand how the Global Pull Schedule works with UTC time, and get guidance on when to configure request delays.
Step 1: Navigate to Create Integration
- In the sidebar menu, go to Home → Integrations.
- Click the Create button (top right corner).
- On the "Choose your integration" screen, select the Salesforce platform.
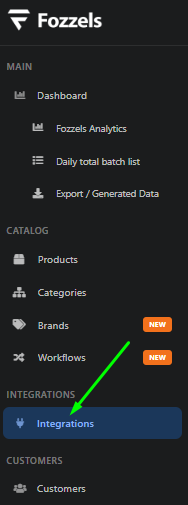

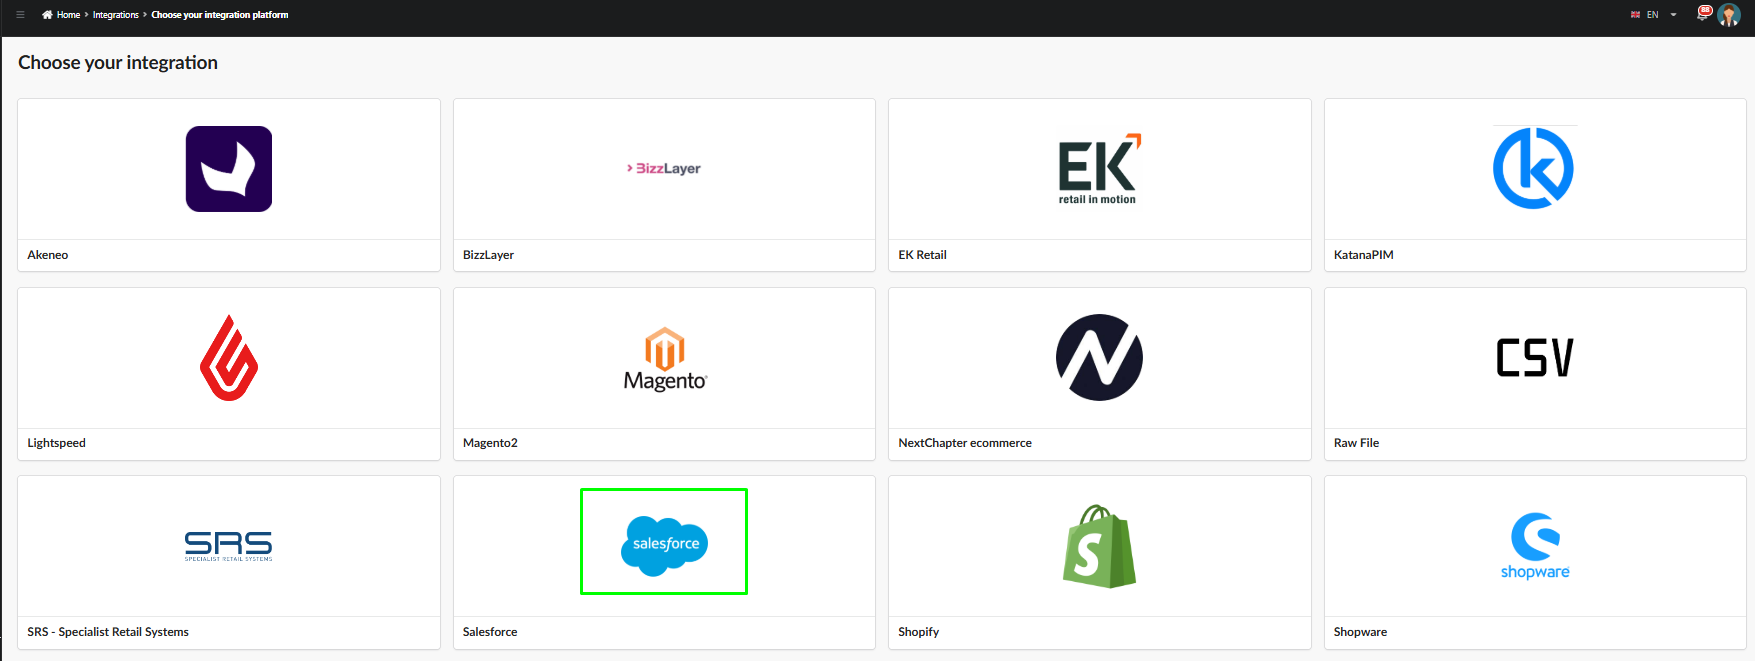
This opens the Create New Integration form, which consists of three steps: 1. Configuration → 2. Websites & Stores → 3. Attributes.
Step 2: Fill in the Configuration Form
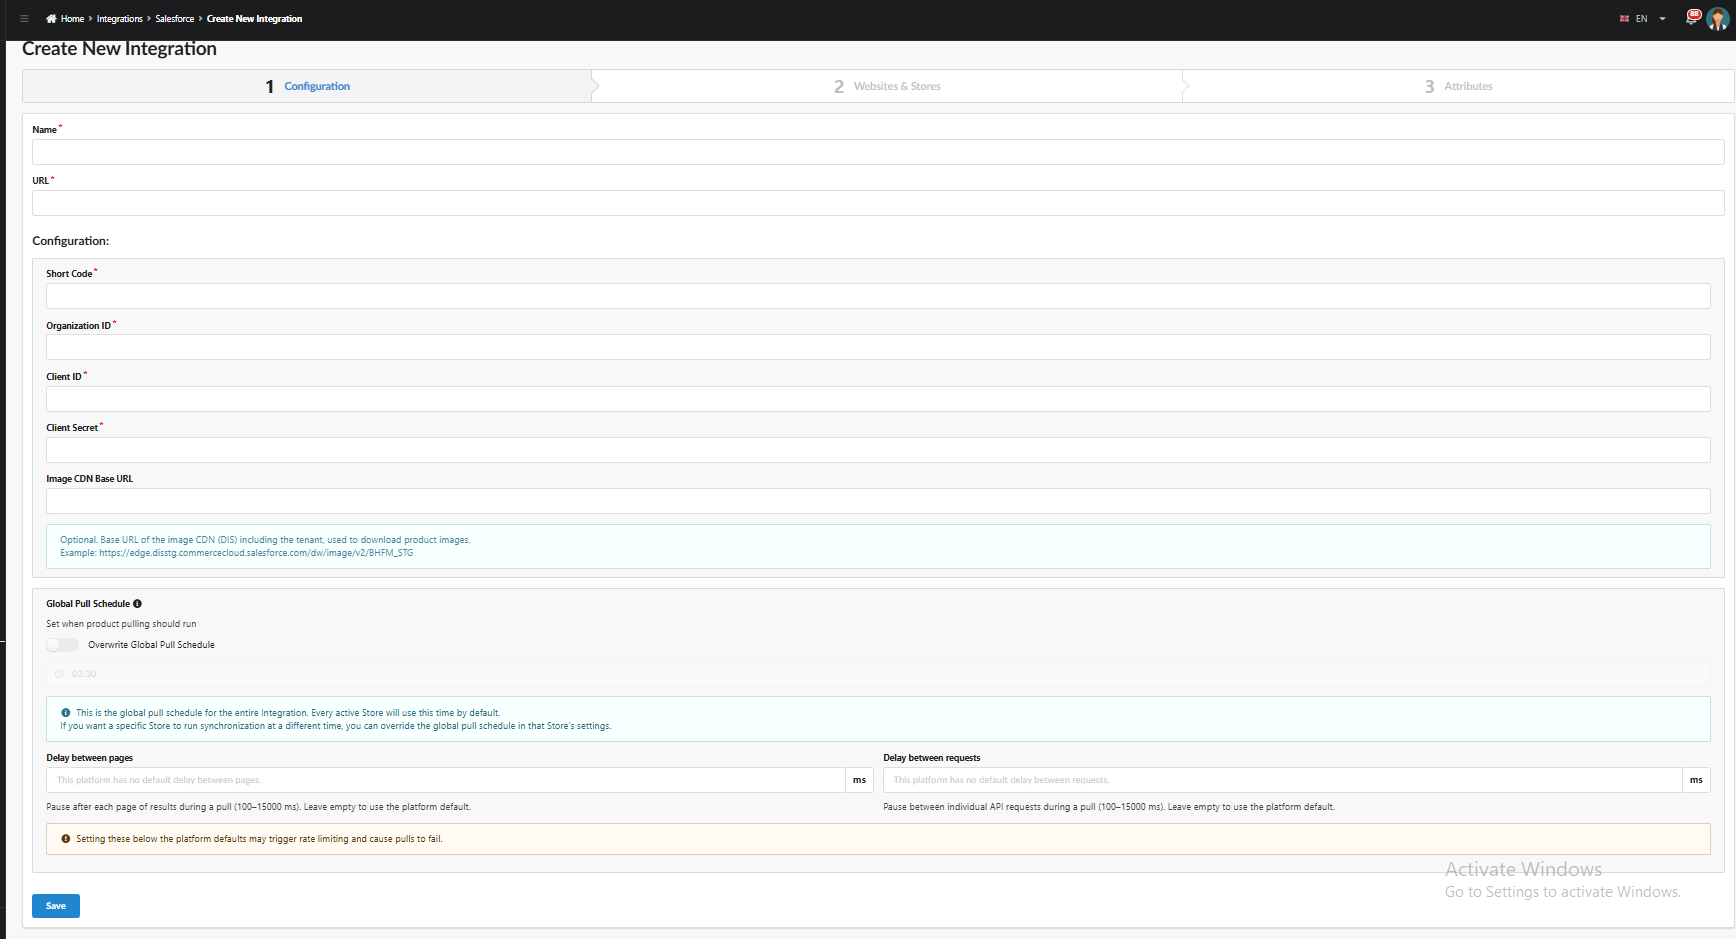
Main fields:
| Field | Description |
|---|---|
| Name* | Integration name — used to identify it in the integrations list |
| URL* | Base URL of your Salesforce Commerce Cloud instance |
Configuration block:
| Field | Description |
|---|---|
| Short Code* | Short code of your Salesforce Commerce Cloud instance |
| Organization ID* | Your Salesforce organization ID |
| Client ID* | ID of the OAuth client created in Salesforce Account Manager |
| Client Secret* | Secret key of that OAuth client |
| Image CDN Base URL (optional) | Base URL of the CDN (DIS) used to download product images. Example: https://exxe.ххххх.commercecloud.salesforce.com/dw/image/v2/XXXX-XXX |
Fields marked with an asterisk () are required.*
Step 3: Global Pull Schedule
The Overwrite Global Pull Schedule toggle lets you set when product syncing should run. If disabled, the default global schedule (03:30) is used.
⚠️ Important: time is set in UTC
The Global Pull Schedule field uses UTC time, not your local timezone.
This matters especially if you have multiple Stores across different regions: a time that's off-peak (night) for one store may fall right during peak traffic hours for another. Running a data pull during peak hours can add extra load to your site and slow it down for shoppers.
Recommendation: if your Stores serve different timezones, don't rely solely on the Global Pull Schedule - override the schedule per Store (
Overwrite Global Pull Schedulein that Store's settings), setting a time that matches that store's actual off-peak window, converted to UTC.
Step 4: Delay Between Pages / Delay Between Requests
The Delay between pages and Delay between requests fields set a pause (in milliseconds, range 100–15000 ms) between result pages and between individual API requests, respectively.
ℹ️ Tip: these fields are optional. If left empty, the platform's default delay is used.
We recommend not setting these values right away when first configuring the integration. Instead, run a few data pulls with the default settings and see how it goes:
- If pulls complete successfully - no further configuration is needed.
- If errors occur (e.g., rate limiting from Salesforce) - return to the integration settings and increase the delay to reduce load on the API.
Step 5: Save
Once all required fields are filled in, click Save to move on to the next step - Websites & Stores.
Step 6: Websites & Stores
After clicking Save, you're redirected to the 2. Websites & Stores tab of the integration.
✅ You'll see a success message: "Integration was created successfully. Please, do not forget to activate your Integration."
1. Activate the integration
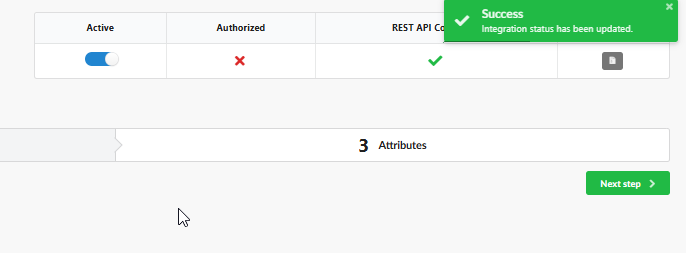
Before you can retrieve your stores/websites, toggle Active to ON (top right of the page, in the integration status bar: Active / Authorized / REST API Connected).
2. Pull Websites and Stores
Click the PULL WEBSITES AND STORES button. This authorizes the connection to Salesforce and retrieves your available Websites and Stores.
✅ Once successful, you'll see: "Integration status has been updated" and later "Your websites and stores was pulled from integration successfully". The Authorized and REST API Connected indicators turn green (✓).
3. Activate Websites and Stores
Once pulled, you'll see a table split into Websites (Name, Code, Status) and Stores (Language, Status, Pull schedule, Products, Pull Progress, Actions).
Toggle each Website and each Store to Active, one by one.
ℹ️ Note: a star (⭐) next to a Website or Store name indicates it's the default (primary) one.
4. Pull Products
Once a Store is active, the Pull products button becomes enabled. Clicking it triggers the product data pull.
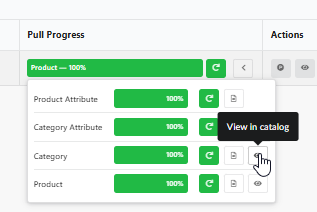
ℹ️ Note: initiating a pull actually runs 4 sequential steps, shown as individual progress bars when you expand Pull Progress (via the dropdown arrow next to the button):
- Product Attribute
- Category Attribute
- Category
- Product
Each step has its own progress bar and a ? Refresh icon to re-run that specific step individually. Every step also has a ? View logs icon to check the detailed log of that pull step.
Additionally, Category and Product steps have a ? View in catalog icon, letting you jump directly to the pulled categories/products in your catalog.
Once all 4 steps reach 100%, the main Pull Progress bar shows "Product - 100%".
Step 7: Attributes
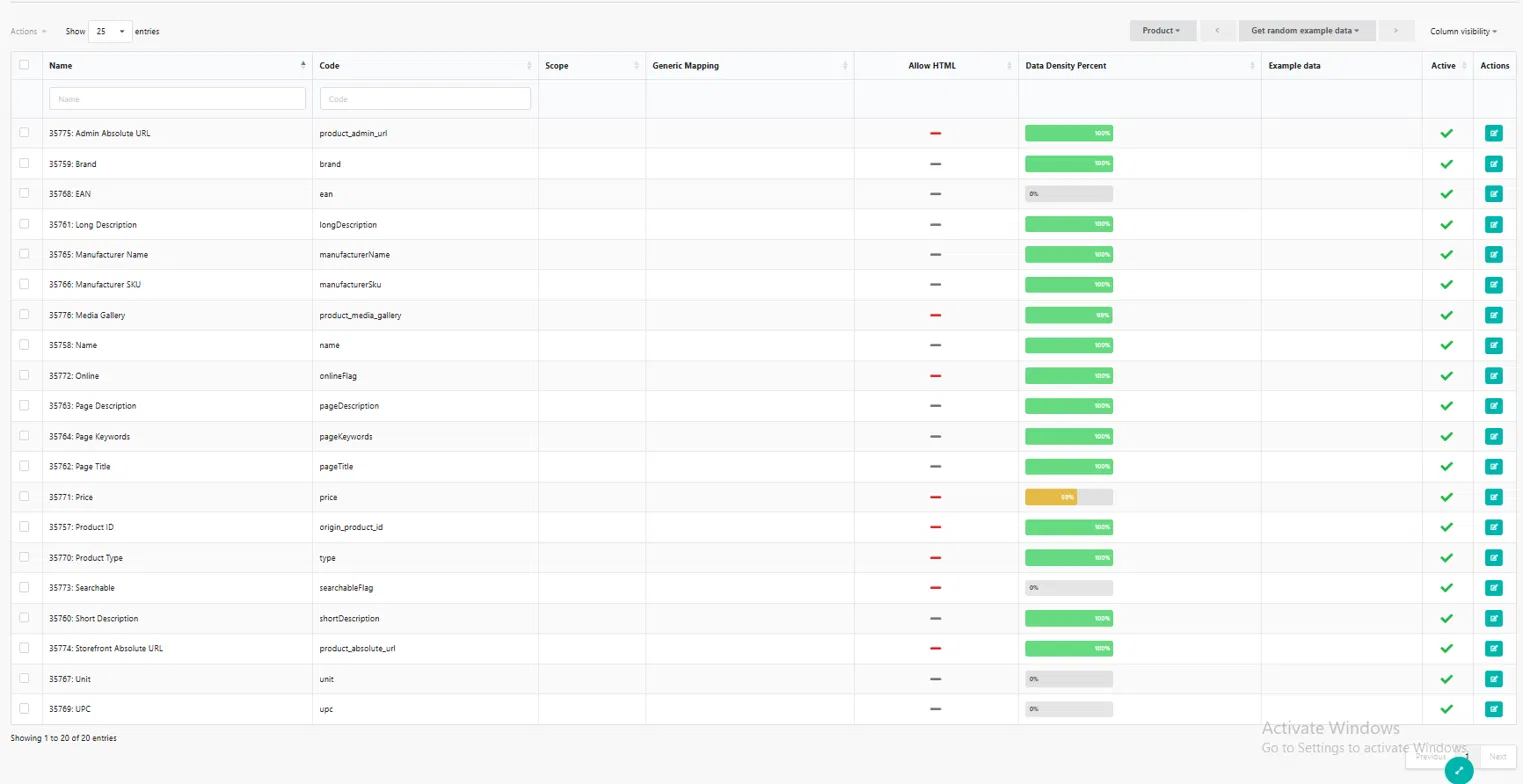
The third and final step, Attributes, shows the list of attributes pulled from your Salesforce catalog, along with their mapping status.
Attribute mode switcher
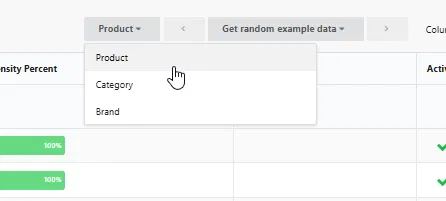
By default, the table displays Product attributes. At the top of the table, there's a mode switcher with three options:
- Product
- Category
- Brand
⚠️ Note: for this integration, Brand attributes are not yet supported - even though it appears as an option in the switcher.
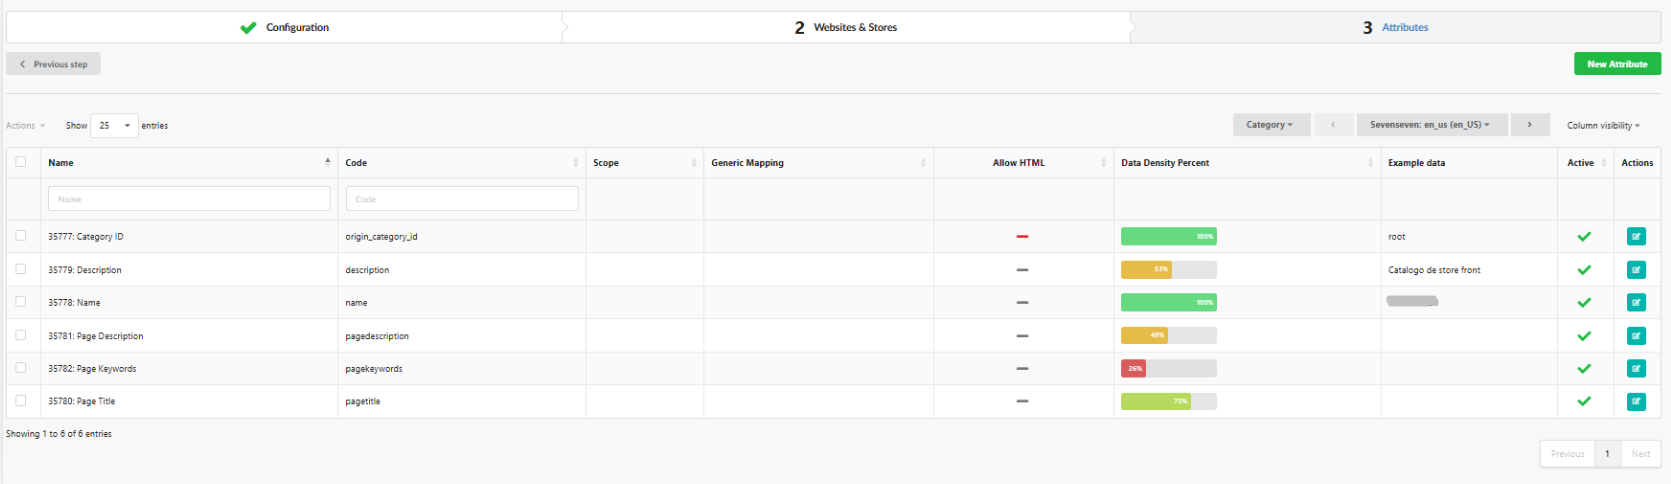
Switching between modes changes which set of attributes is displayed. For example, switching to Category shows category-specific attributes like Category ID, Description, Name, Page Description, Page Keywords, Page Title.
Table columns:
| Column | Description |
|---|---|
| Name | Attribute ID and label (e.g., 35759: Brand, 35777: Category ID) |
| Code | The technical attribute code from Salesforce (e.g., brand, ean, origin_category_id) |
| Scope | Attribute scope (if applicable) |
| Generic Mapping | Whether the attribute is mapped to a generic/system field |
| Allow HTML | Whether HTML content is allowed for this attribute (✓/—) |
| Data Density Percent | Percentage of products/categories that actually have a value for this attribute — helps spot sparsely-populated fields (e.g., Page Keywords at 26%, Category ID at 100%) |
| Example data | A sample value pulled from an actual record (product or category, depending on mode) |
| Active | Whether the attribute is currently active/in use (✓) |
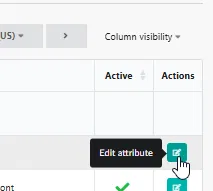
| Actions | Edit (✏️) icon to configure the attribute mapping |
Toolbar options:
- Actions dropdown - bulk actions for selected attributes
- Store selector (e.g., Mystore
: en_us (en_US)) - choose which Store to pull example data from - Get random example data - once a Store is selected from the dropdown, this fills the Example data column with a fresh, randomly-picked sample value per attribute - useful to sanity-check the mapping
- Column visibility - show/hide table columns
- New Attribute (top right) - manually add a custom attribute not included in the default list
ℹ️ Note: the attributes shown by default are the base set provided out of the box (e.g., Brand, EAN, Long Description, Price for Product mode; Category ID, Name, Description for Category mode). If your Salesforce catalog includes custom attributes, use the New Attribute button to add and map them manually.
Step 8: Editing an Attribute
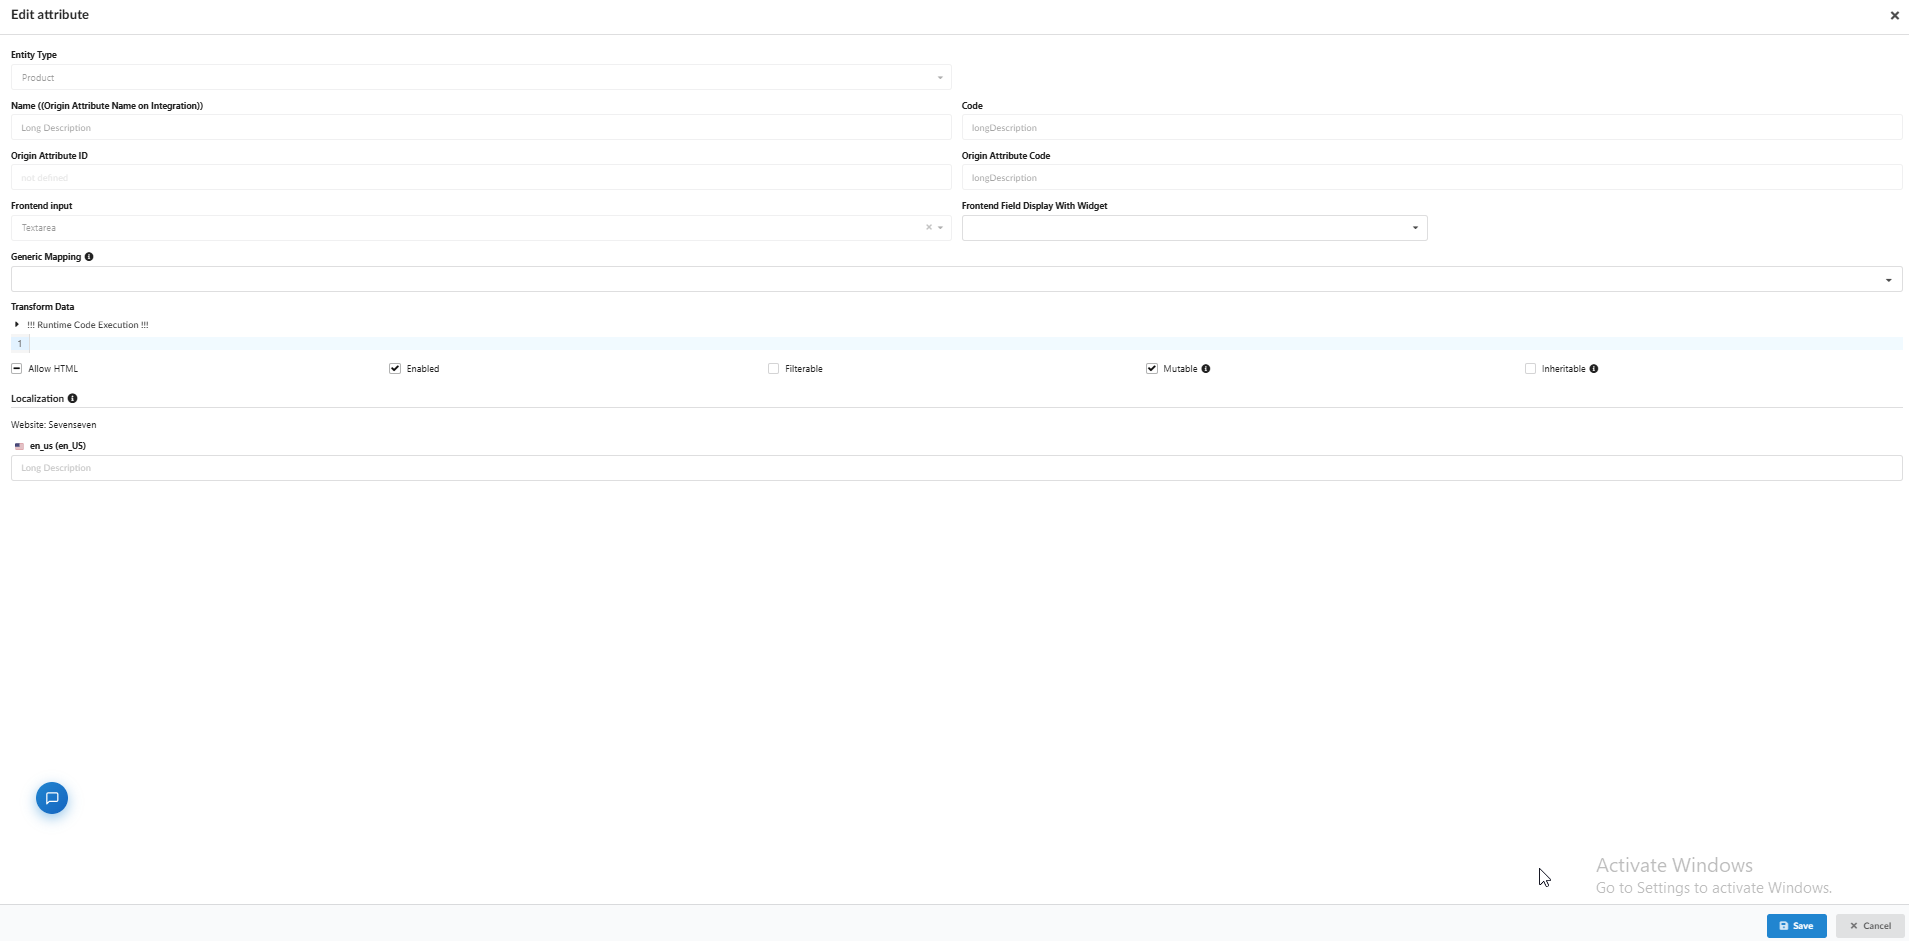
Clicking the ✏️ Edit attribute icon in the Actions column opens the Edit attribute popup, showing all details for that attribute - some fields are editable, others are read-only/system values.
Fields:
| Field | Description |
|---|---|
| Entity Type | Whether the attribute belongs to a Product, Category, or Brand (read-only) |
| Name (Origin Attribute Name on Integration) | The attribute's display name as it comes from Salesforce (e.g., Long Description) |
| Code | The internal attribute code (e.g., longDescription) |
| Origin Attribute ID | The attribute's ID on the source integration side (if defined) |
| Origin Attribute Code | The attribute's code as it exists on the Salesforce side (e.g., longDescription) |
| Frontend input | The input type used to display/edit this field (e.g., Textarea) |
| Frontend Field Display With Widget | Optional widget used to render this field in the frontend |
| Generic Mapping ℹ️ | Maps this attribute to a generic/system field, if applicable |
| Transform Data | Advanced: allows runtime code execution to transform the incoming data before it's saved (⚠️ marked with a warning — for advanced/technical use) |
Checkboxes:
| Option | Description |
|---|---|
| Allow HTML | Whether HTML content is allowed in this field |
| Enabled | Whether the attribute is active and in use |
| Filterable | Whether this attribute can be used as a filter (e.g., in catalog navigation) |
| Mutable ℹ️ | Whether the value can be changed/overwritten after the initial pull |
| Inheritable ℹ️ | Whether the value is inherited (e.g., from a parent category or default store) |
Localization
Below, per Website (e.g., Mystore) and each active locale (e.g., en_us (en_US) ??), you can enter/edit a localized value for this attribute directly — for example, overriding the Long Description text shown for that specific website/locale.
Click Save to apply changes, or Cancel to discard them.
⚠️ Caution: the Transform Data field allows runtime code execution - this is an advanced feature. Incorrect code here may break data processing for this attribute. Recommend using it only if you understand the transformation logic needed, or documenting a support-team contact if unsure.
At this point, the Salesforce integration itself is fully configured: authorized, connected, with Websites/Stores activated and product data pulled successfully.
The next steps - setting up Catalogs and building the Flow - follow the same process as with any other integration type and are covered in the general integration documentation, not specific to Salesforce.
Was this article helpful?
That’s Great!
Thank you for your feedback
Sorry! We couldn't be helpful
Thank you for your feedback
Feedback sent
We appreciate your effort and will try to fix the article