WooCommerce Preparation: API Key Creation
To ensure a secure connection between Fozzels and WooCommerce, the following steps must be completed to generate the special API keys (Customer Key and Customer Secret) in the WooCommerce account.
Step 1: Log in to WooCommerce
Open a browser and log in to the your Woocomerce account.
Use the administrator login and password.
Step 2: Navigate to API Settings
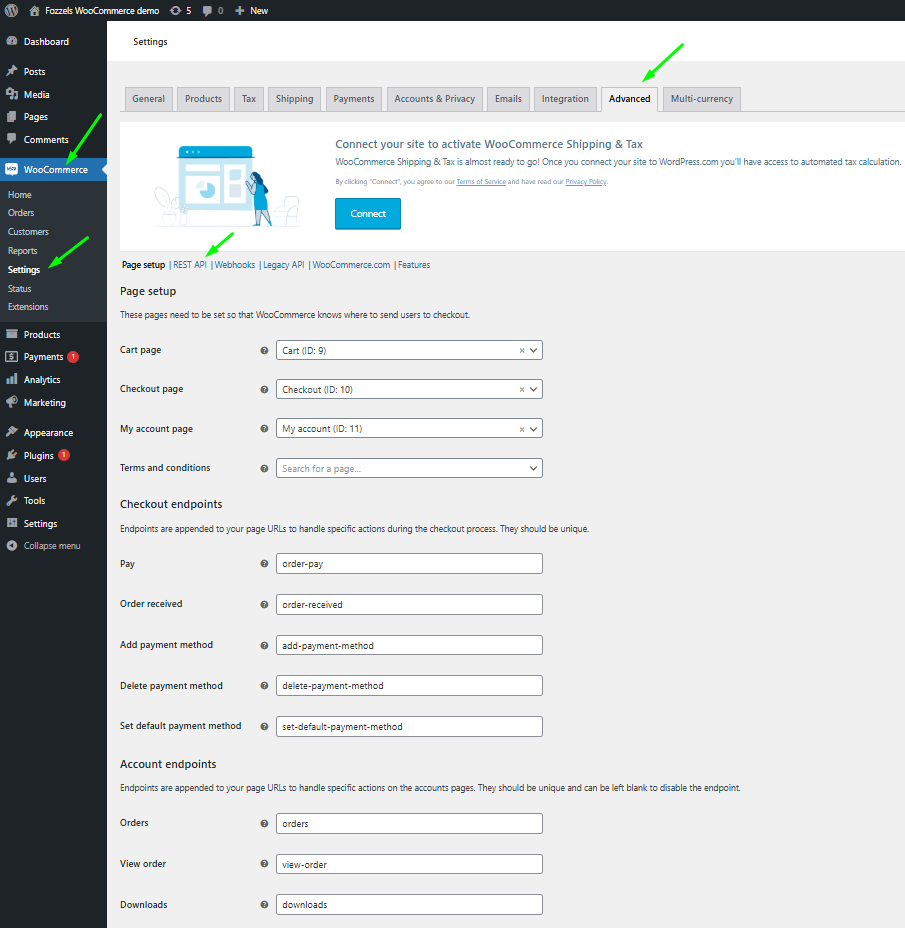
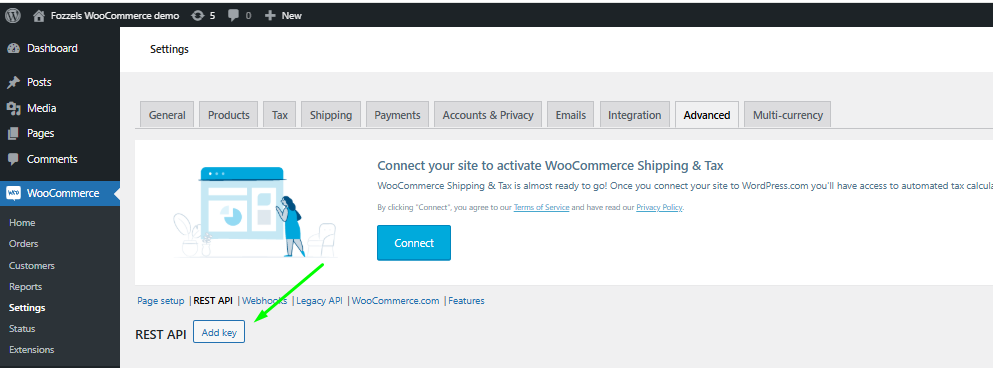
In the main WooCommerce menu, go to the "Settings" / Advanced / REST API tab.
Select "Add Keys".
Step 3: Create a New API Key
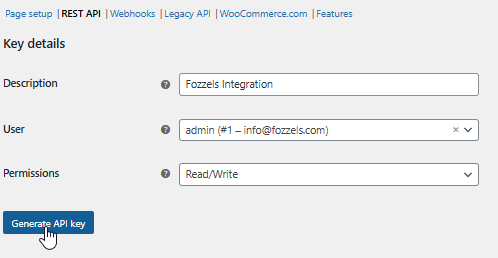
1. In the new API Key, add the Description and choose the needed permissions “Read and Write” from the dropdown.
2. Press the “Generate API KEY” button.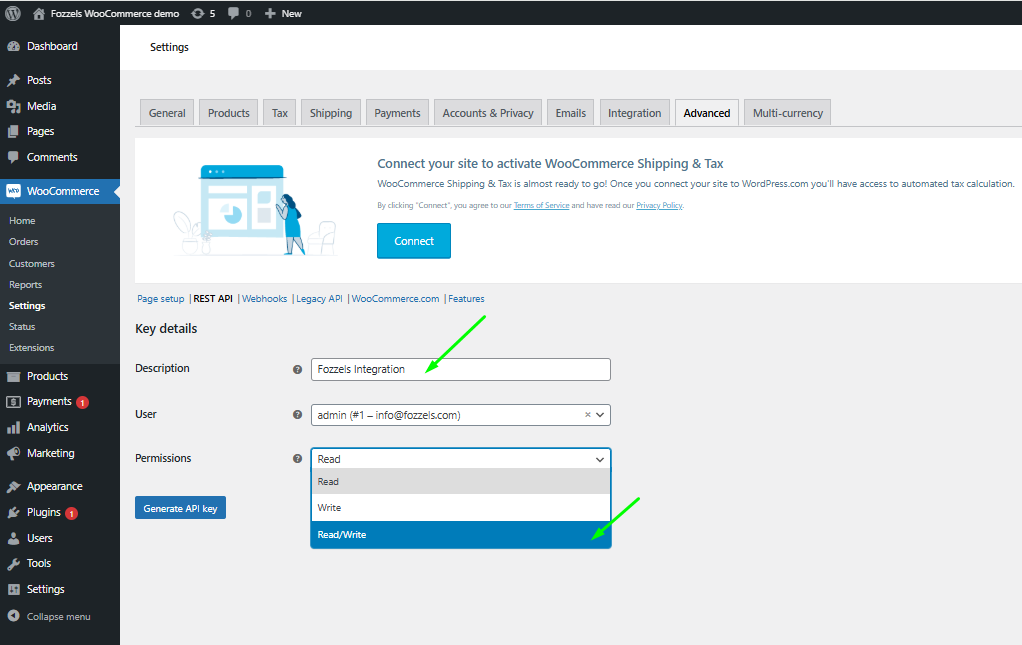
Note: Granting "Write" access allows Fozzels to not only read data but also update data in your WooCommerce store, ensuring two-way synchronization.
If you have done everything correctly, a window with the generated keys for the new integration will open. You will also receive the message: 'API Key generated successfully. Make sure to copy your new keys now, as the secret key will be hidden once you leave this page.' Transfer these keys to the integration settings in Fozzels.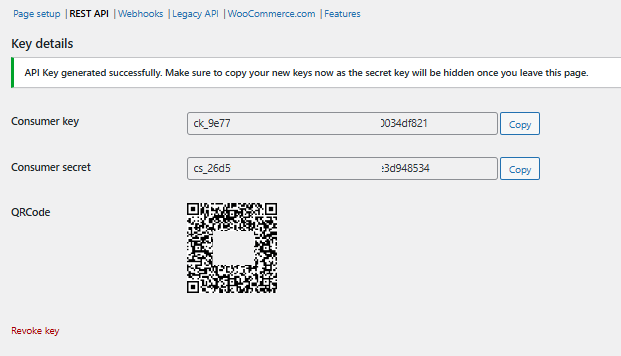
Configuration in Fozzels
Step 4: Starting a New Integration
Log in to your Fozzels account.
Go to the Integrations page.
Click the "New Integration" button.
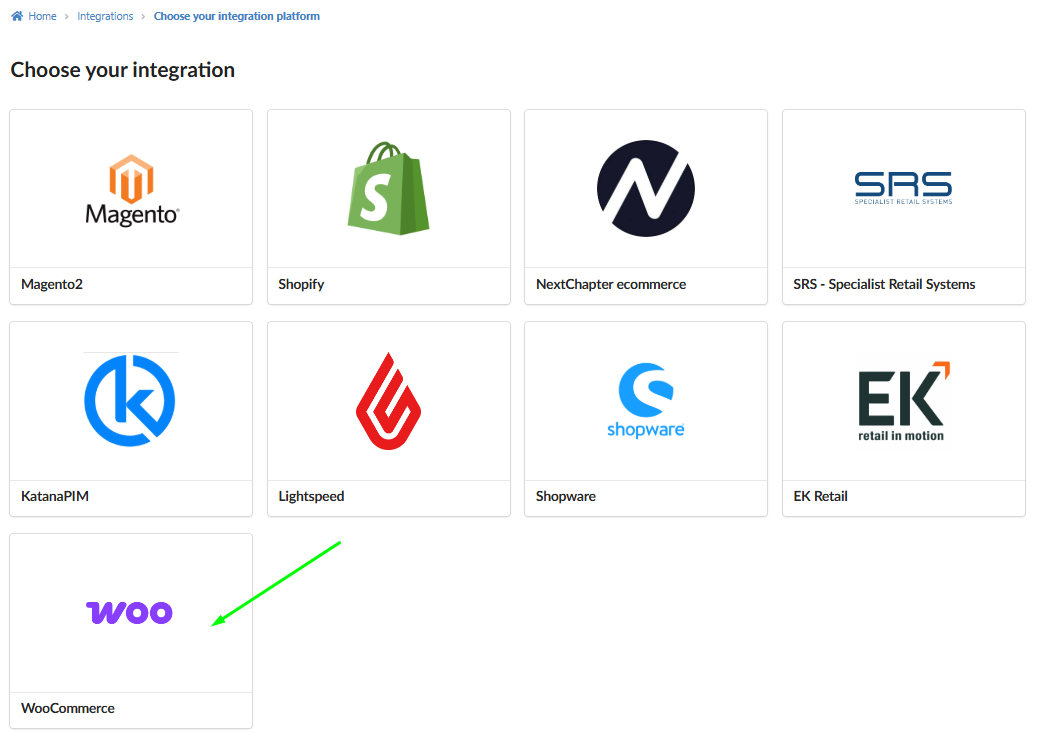
Select "WooCommerce" from the list of available services.

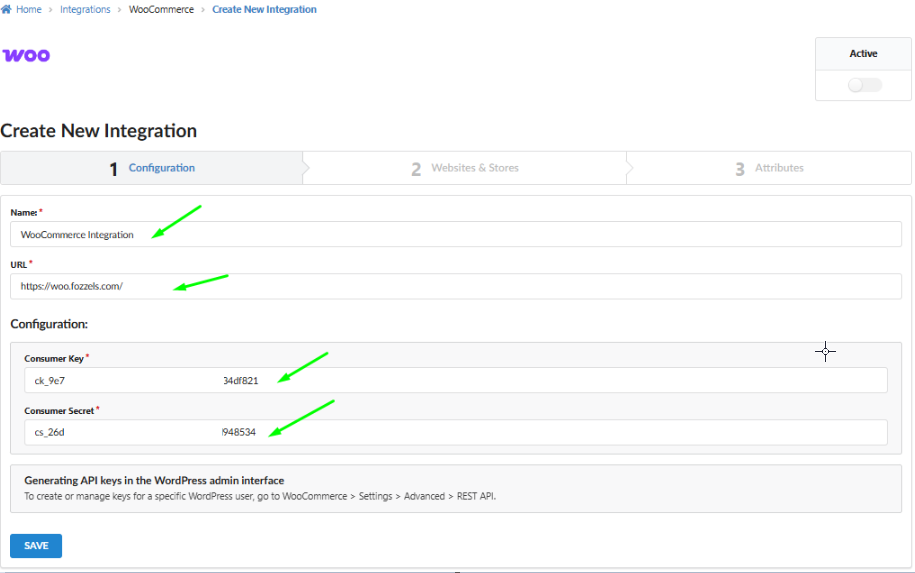
Step 5: Fill in Configuration Fields
On the "Create New Integration" page, fill in the following fields using the keys copied in Step 6:
Name: Enter a clear name for this integration (e.g., WooCommerce_INT).
URL: Enter the URL of your WooCommerce store
Customer Key: Paste the Customer Key copied from WooCommerce.
Customer Secret: Paste the Customer Secret copied from Woocommerce.
Step 6: Activate and Save the Integration
Activate the integration by switching ON the "Active" toggle in the top right corner.
Click the "SAVE" button to save the changes.
After successful saving, you will proceed to the next configuration steps in Fozzels ("Websites & Stores" and "Attributes"), where you can set up product and attribute synchronization.
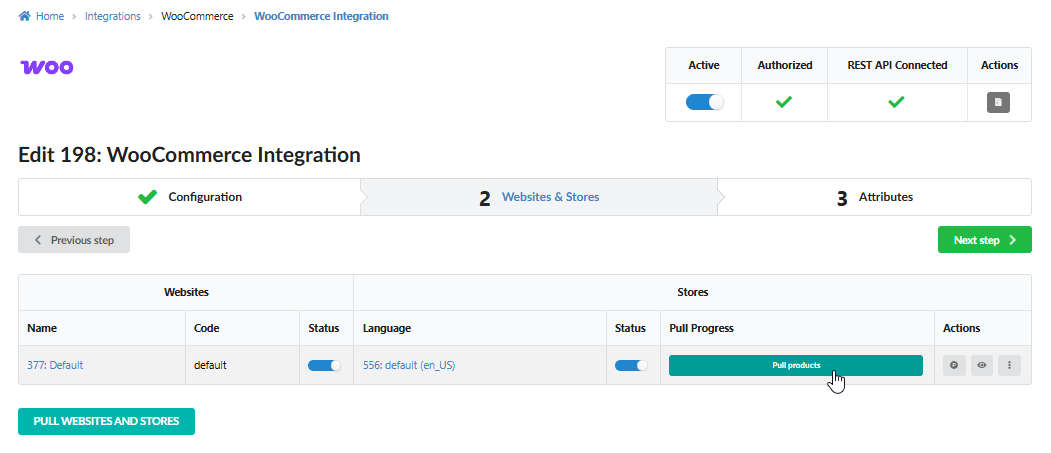
Step 7: Websites & Stores Setup
After saving the configuration, proceed to the "Websites & Stores" tab:
Click the "Pull Websites and Stores" button. This will retrieve and display all associated websites and stores from your WooCommerce account.
Activate the required websites and stores by switching the corresponding Status toggles to ON.
For each necessary store, click the "Pull products" button. This action initiates the initial load of product data into Fozzels.
Once the product loading process is complete, Fozzels is ready for work! You can proceed to the "Attributes" tab to configure your synchronization rules.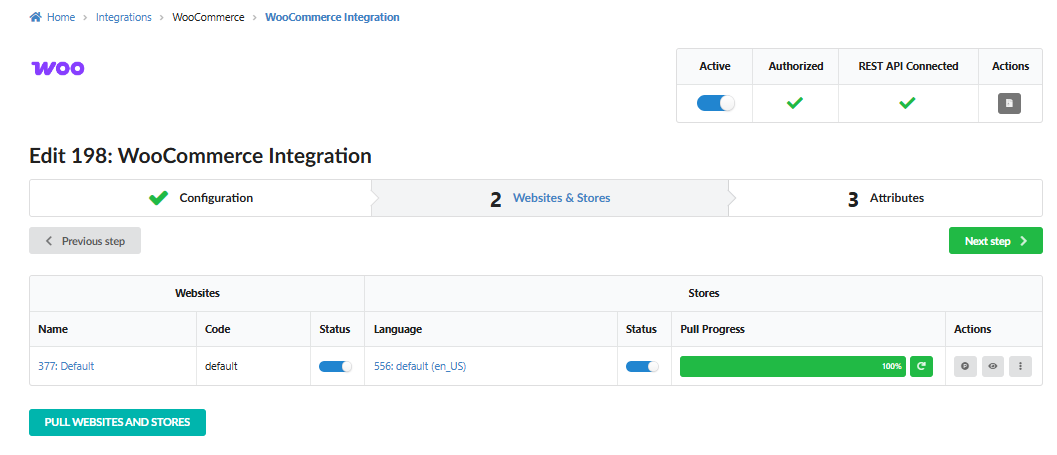 Read our special articles for instructions on how to create your own new flows.
Was this article helpful?
That’s Great!
Thank you for your feedback
Sorry! We couldn't be helpful
Thank you for your feedback
Feedback sent
We appreciate your effort and will try to fix the article