The Product Catalog is your primary tool for centralized product data management and pre-Flow selection. It contains all product entities and attributes synchronized from your integrated e-commerce platform (e.g., Magento, Shopify, NextChapter). The Catalog allows you to quickly filter and select specific product subsets using powerful filtering tools before creating a targeted Content Flow. This process streamlines generation and controls costs. 
To access the Catalog, select the Catalog tab in the main application header. 
1. Initial Setup and Store Selection
1.1. Choosing the Data Source Upon opening the Catalog, the first step is selecting your data source using the "Choose integration /website / store" dropdown menu.
Default Selection: If your account has only one active integration and default store, the products will display automatically. Otherwise, you must explicitly select a store.
Store List: The dropdown lists all active and archived integrations. Archived integrations will be displayed but marked as inactive. You can select any linked website and store.
Synchronization: Once a store is selected, the product table populates with all entities available in that store's admin. If data is missing, ensure you have synchronized the products from the Integration page.
Orientation: The navigation path (breadcrumbs) dynamically updates to confirm the website and store you are currently viewing.
1.2. Managing the Table View
Display Limits: Use the dropdown above the table to set the number of products displayed per page. Options include 5, 10, 25 (default), 50, 75, and 100 products. Use the pagination controls at the bottom to switch between pages.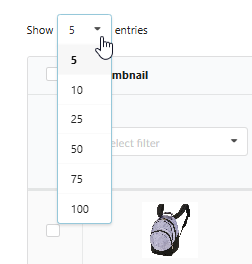
Maximizer Icon: Click the maximizer icon on the far left of the table to expand the view, dedicating more screen space to the data.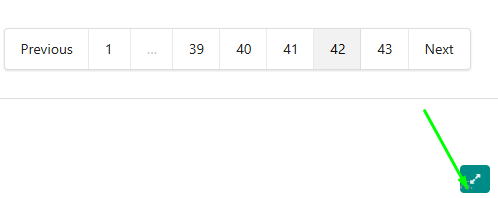
2. Customizing Column Visibility
The Column visibility toggle allows you to customize the table layout by showing or hiding attribute columns.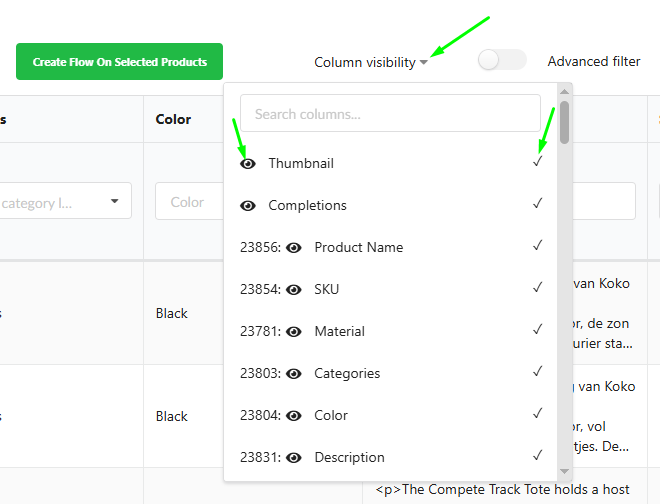
Accessing Attributes: Click the Column visibility toggle to open the dropdown menu, which lists all active attributes available in your integration. Inactive attributes are not listed here and cannot be displayed. To view products by an inactive attribute, you must first activate it in the Attributes tab.
Searching Attributes: Use the search input at the top of the dropdown to quickly find a specific attribute. Click the cancel icon (cross) that appears when typing to reset the search.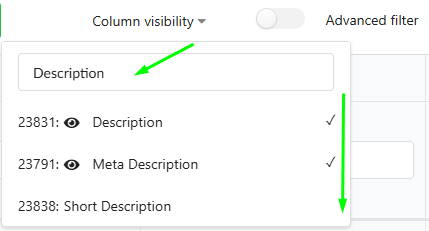
Adding a Column: Simply deselect the check-mark to hide the column from the table. A check-mark icon confirms the column is visible.
Focusing on a Column: Click the "Eye" icon next to an attribute name. The table will automatically scroll horizontally to bring that column into view, and the column header will be highlighted.
Removing a Column: Simply deselect the check-mark to hide the column from the table.
Use the right side bar to manage Columns and create a flow.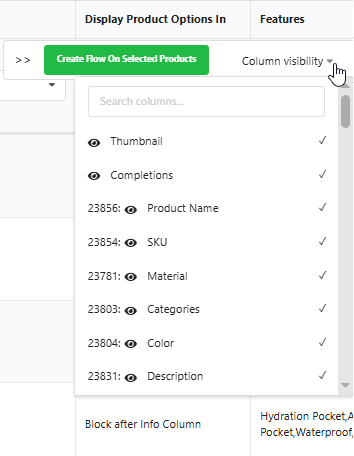
3. Filtering Products for Selection
The Catalog offers two powerful ways to filter your product set before creating a Flow.
3.1. Direct Column Filtering You can filter products by interacting directly with the column headers in the table: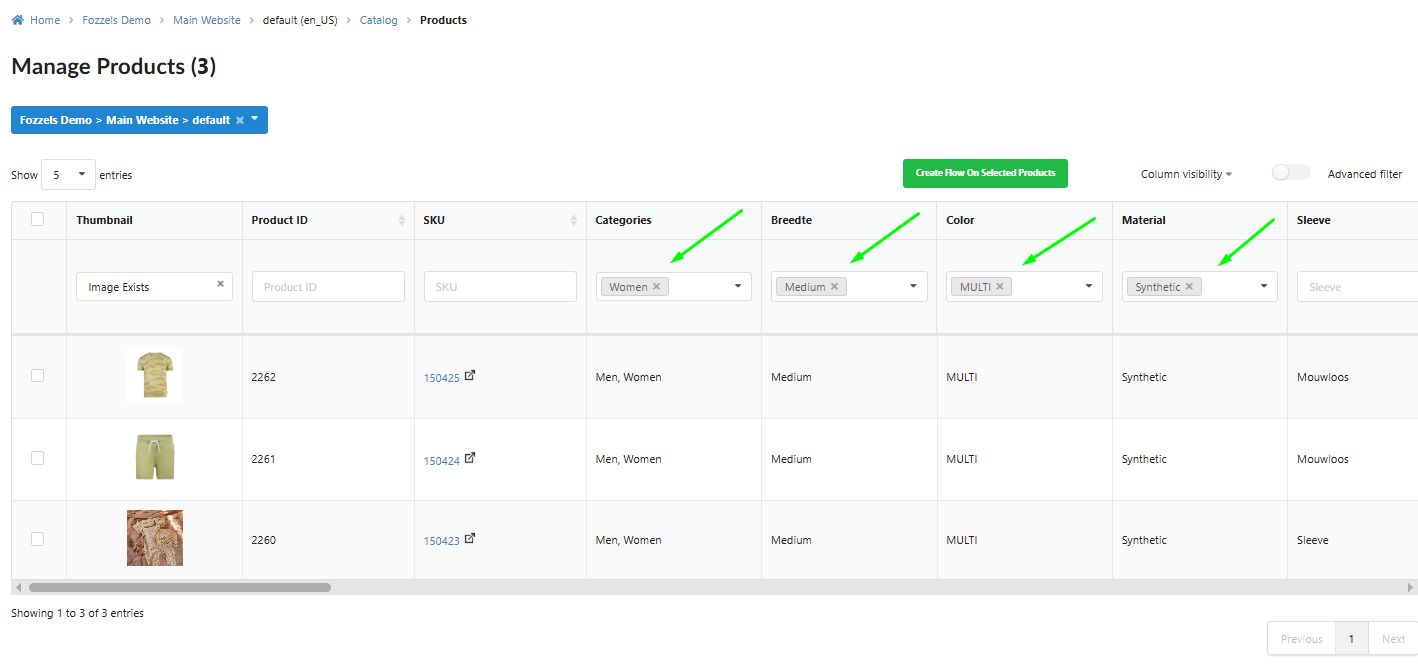
Text Inputs: Use the search input at the top of any text-based attribute column to filter products dynamically as you type.
Dropdowns and Selections: For attributes with defined values (like 'Brand' or 'Size'), you can type to search for options, or select and remove one or more options.
Category Filtering: For the "Categories" attribute (if correctly configured with "Category tree" and "Filterable"), you can expand the tree structure and select multiple categories to narrow the product list.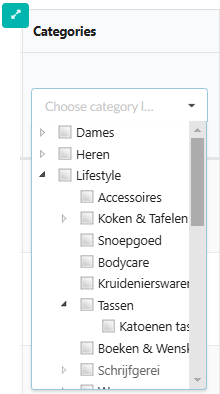
3.2. Advanced Filter Configuration
The Advanced filter toggle provides a more granular, conditional logic interface, identical to the filtering used in the Flow Builder.
Activating the Form: Click the Advanced filter toggle. This action hides all direct column search inputs and displays the UI form for building complex conditions.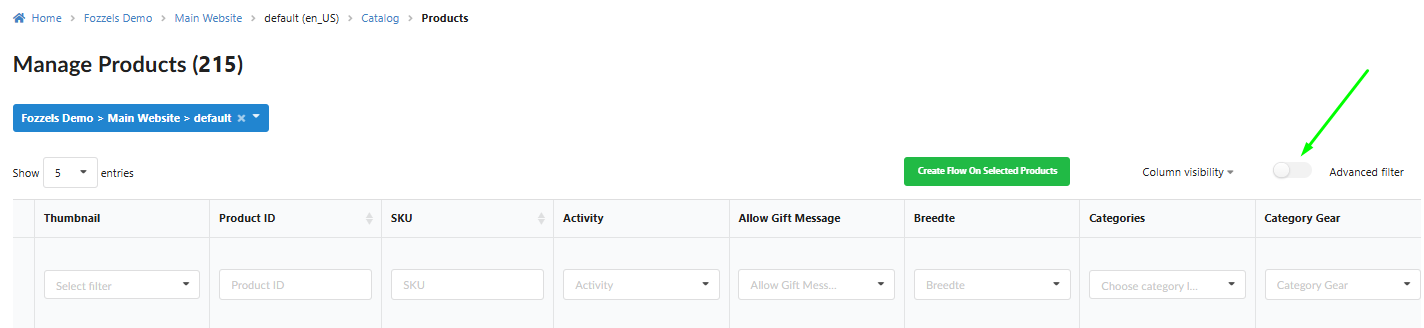

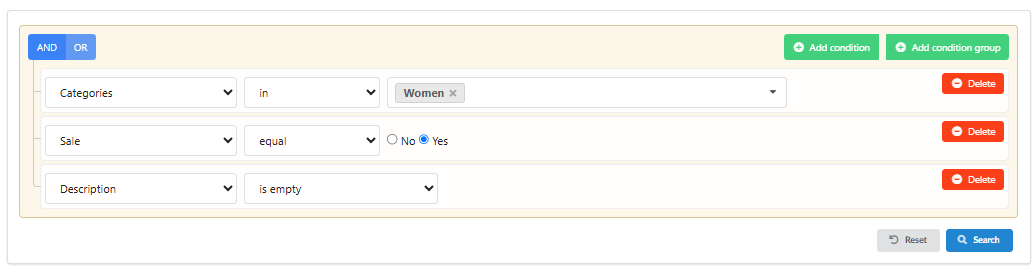
Transferring Filters: All filters previously selected in the table columns are automatically transferred to the Advanced Filter UI form when activated, and vice versa.
Building Conditions: Use the buttons in the UI to add individual conditions or groups of conditions (e.g., Brand 'Only' AND Size 'XS').
Press the "Search" button to apply the logic and update the product table.
Management: Use the "Delete" button to remove single conditions, or the "Reset" button to clear all conditions and restore the full product list.
4. Utilizing Specialized Columns
Thumbnail Column: Products with images will display the first image here. If images are missing, verify your "Product Absolute Image URL" attribute settings. You can filter the catalog using the column's dropdown to see only products with "Image missing" or "Image exists."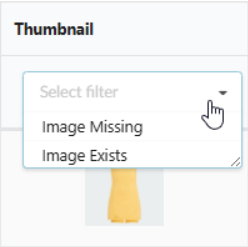
Hovering over an image displays the full gallery preview. Clicking the image opens the Detailed Product View.
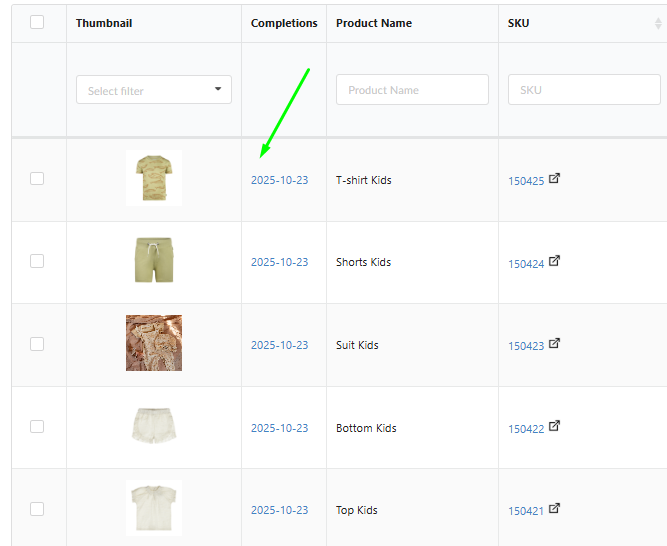
Contents Column: This column displays the synchronization date of the last generated content (not the generation date). The date is a link; clicking it opens the list of completions for that product.
5. Creating a Flow from Selected Products
Once you have filtered the Catalog to the desired subset of products, you can immediately initiate a new Flow.
Selection: Products are selected either by the applied filters (Direct or Advanced) or by manually selecting rows using the table checkboxes.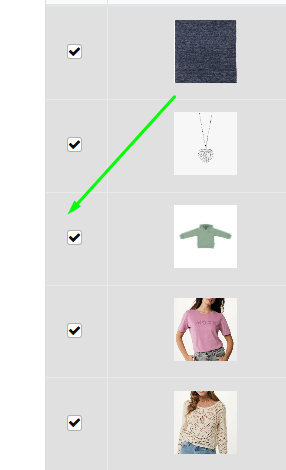
Initiation: Click the "Create button "Create Flow On Selected Products" button.
Pre-filled Flow: You will be redirected to the new Flow creation page. The store selected in the Catalog will be automatically chosen, and the filters you applied in the Catalog will be automatically transferred and set up in the product selection step (Step 3) of the new Flow.
Was this article helpful?
That’s Great!
Thank you for your feedback
Sorry! We couldn't be helpful
Thank you for your feedback
Feedback sent
We appreciate your effort and will try to fix the article